Table of Contents Show
When you are downloading or installing the applications the error like Google Play Store error 921 on note 10Plus occurs. This is quite irritating, but it easy to fix. It is not an app or device-related issue so if you are the owner of Note 10Plus, you might go through this issue.
This type of issue can be fixed on your own there is no need for any technician. The below trick is easy to perform and it may help you to fix Google play store error 921 on Samsung.
Fix Google Play 921 Error on Samsung
Trick 1: Force Restart your device
Performing a soft reset will reload all services and apps. A soft reset will refresh all device memory. If there is a firmware related issue then this trick is effective. If this error in the device is because of petty bug then this procedure can solve it.
How to perform a forced restart on Note 10Plus?
- Press the Volume Low Button.
- At the same time, hold the Power Key.
- Continue to hold both the buttons for 10-15 seconds.
When the device completes the restarting, access the Play store and verify 921 error. If it occurs then move further to the next trick.
Trick 2: Delete Play Store Cache and Data
A problem like this can take place when the cache is outdated or corrupted. So this time we will delete the cache of the play store and replace it with a new one.
How to delete play store cache and data on Note 10Plus?
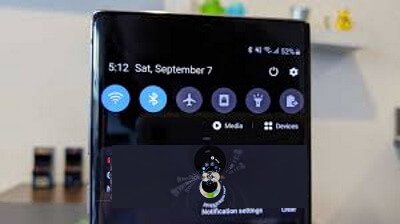
- Pull down the Notification Panel.
- Navigate to Settings Icon.
- Touch Apps.
- Search and hit the Google Play Store.
- Touch Storage.
- Hit Clear Cache.
- Tap Clear Data.
- Hit OK.
After the completion of the process verify the issue.
Trick 3: Reset Network Settings
When you download or update an app it is essential to have an internet connection to be stable. Having an unstable internet during download or update may lead to error.
How to reset network settings on Note 10Plus?
- Access the Notification Panel.
- Hit Settings.
- Tap Reset.
- Go to Reset Network Settings.
- Touch Reset Settings.
- Enter it, if you set up a PIN.
- Lastly, hit Reset.
Trick 4: Wipe Cache Partition
By replacing new cache with old cache there are chances that it can fix the error. It is an effective procedure because there is no need to create back up data or files. It is a quite effective procedure to fix petty bugs as compared to other tricks.
How to perform wipe cache partition on Note 10Plus?
- Switch off note 10Plus.
- Hold the Volume High Button + Bixby Button, press the Power Button.
- When Note 10Plus symbol appears, let out all the buttons.
- The Note 10Plus go to Recovery Mode.
- Now hold the Volume Low Key to feature Wipe Cache Partition.
- Use the Power Button to select.
- Hold the Volume Low Button to feature YES.
- Reboot System Now is appeared.
- Press the Power Button to restart Note 10Plus.
Trick 5: Perform a factory reset
If all the above workaround doesn’t fix the error then there is no option rather than factory reset. It will fix all the serious firmware issues on the Note 10Plus. The factory reset will bring the device to its default settings.
Note: You need to back-up all the important data stored in the device.
How to factory reset Note 10Plus?
- Tap Settings.
- Go to General Management.
- Touch Reset.
- Hit Factory Reset Data.
- Select Reset.
- Tap Delete All.
More Posts,


